To clean a sticky herb grinder, soak it in isopropyl alcohol and then scrub it with a toothbrush.
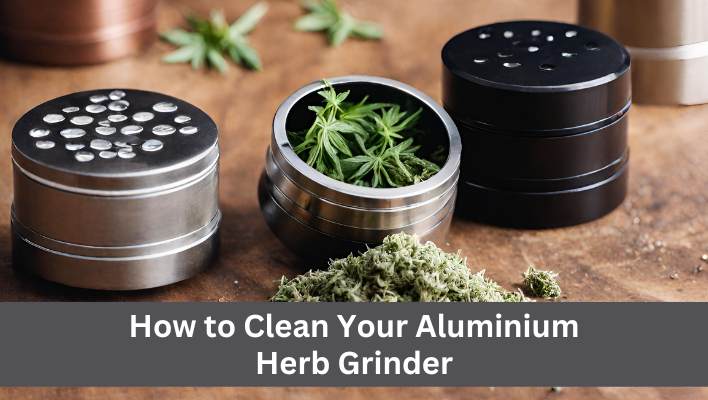
Keeping your herb grinder clean is an essential aspect of maintaining its functionality and enhancing your smoking experience. Over time, herb grinders can become sticky due to the buildup of resin and other plant materials. This stickiness not only hampers the grinder’s smooth operation but also affects the quality and flavor of your herbs. In this section, we will explore the reasons why cleaning your herb grinder is essential and the impact a sticky grinder can have on your overall smoking experience.
Reasons Why Cleaning Your Herb Grinder Is Essential
Regularly cleaning your herb grinder offers several advantages:
- Preserving the grinder’s efficiency: A clean grinder ensures that the teeth or blades can effectively break down your herbs into smaller, consistent pieces, allowing for a smoother and more efficient grinding process.
- Preventing contamination: Accumulated residue in a sticky grinder can contaminate your herbs and affect their quality. By cleaning your grinder, you remove any impurities, ensuring a pure and enjoyable herb-smoking experience.
- Extending the lifespan of your grinder: Regularly cleaning your herb grinder helps to prevent clogs, rust, and other issues that may shorten its longevity. With proper maintenance, your grinder can last for years, providing you with reliable performance.
The Impact Of A Sticky Herb Grinder On Your Smoking Experience
A sticky herb grinder can have detrimental effects on the quality of your smoking experience:
- Difficulty in grinding: When resin builds up, it can cause the grinder’s teeth or blades to become stuck, making it increasingly challenging to grind your herbs. This can lead to frustration and hinder the convenience of using a herb grinder.
- Reduction in potency: As resin accumulates on the grinder’s surfaces, it can mix with your herbs and reduce their potency. This means you may not be getting the maximum effect or flavor from your herbs.
- Inconsistent burn: A sticky grinder can result in unevenly ground herbs, leading to an inconsistent burn. This may affect the smoothness of your smoking experience and result in wasted herbs.
Understanding the importance of cleaning your herb grinder is crucial for maintaining its efficiency, preventing contamination, and ensuring the longevity of your grinder. Moreover, a sticky grinder can cause difficulties in grinding, reduce the potency of your herbs, and result in an inconsistent burn. By incorporating regular cleaning into your routine, you can optimize your smoking experience and enjoy the full flavor and benefits of your herbs.
Read Also: Can I Store My Herb In The Grinder
Gathering The Necessary Materials For Cleaning
Having a sticky herb grinder can be quite frustrating, as it can hinder the efficiency of grinding your herbs. However, with the right materials, cleaning your grinder can be a breeze. In this section, we will discuss the essential materials you need to gather in order to clean your sticky herb grinder effectively.
List Of Materials
To clean your sticky herb grinder, you will need the following materials:
- Isopropyl alcohol
- Cotton swabs
- Toothpick
- Small brush (such as a paintbrush)
- Plastic scraper
- Freezer
Importance Of Each Material
Now let’s explore why each of these materials is important for the cleaning process:
1. Isopropyl alcohol
Isopropyl alcohol is an essential ingredient for cleaning a sticky herb grinder. It is a powerful solvent that effectively breaks down the residue and sticky buildup trapped within the grinder’s parts. The high alcohol content helps dissolve the sticky substances, making it easier to remove them completely.
2. Cotton swabs
Cotton swabs are perfect for reaching those hard-to-clean nooks and crannies of your herb grinder. They provide excellent precision when applying the isopropyl alcohol onto the surfaces covered in residue. The compact shape and absorbent cotton tips help ensure thorough cleaning without leaving behind any pesky residues.
3. Toothpick
A toothpick comes in handy for dislodging stubborn residue stuck in tight spots that cotton swabs or brushes may struggle to reach. Its pointed tip can effectively scrape away the sticky buildup, giving you more control over the cleaning process. Remember to be gentle to avoid damaging the grinder’s delicate parts.
4. Small brush (such as a paintbrush)
A small brush, like a paintbrush, helps remove loose particles and debris from the grinder’s surfaces. The bristles of the brush can reach into the grinder’s teeth, ensuring a more thorough clean. By using a brush, you can easily sweep away any remaining residue and make your grinder look like new again.
5. Plastic scraper
A plastic scraper is a useful tool for removing larger chunks of sticky residue from the grinder’s teeth and screen. Its sturdy yet non-abrasive material ensures that it won’t damage or scratch your grinder during the cleaning process. A plastic scraper is an effective way to loosen and collect the sticky buildup before applying the isopropyl alcohol.
6. Freezer
Believe it or not, the freezer can be a valuable asset when it comes to cleaning a sticky herb grinder. Placing your grinder in the freezer allows the sticky residue to harden, making it easier to scrape off later. This chilling effect reduces the stickiness, allowing for a more efficient cleaning process.
With these essential materials at hand, you’re now ready to tackle the task of cleaning your sticky herb grinder. But before diving into the cleaning process itself, be sure to gather all the materials mentioned above to ensure a smooth and effective cleaning experience.
Read Also: How To Grind Dried Herbs Into Powder?
Step 1: Disassembling The Herb Grinder
Cleaning a sticky herb grinder might seem like a daunting task, but with the right approach, it can be a breeze. The first step in restoring your grinder to its former glory is to disassemble it properly. By following this step-by-step guide, you’ll be able to separate the different parts of your grinder and ensure thorough cleaning.
Separating The Different Parts Of The Grinder
Before you begin cleaning, it’s important to understand the anatomy of your herb grinder. Most grinders consist of several components, including the lid, grinding chamber, kief catcher, and the individual teeth or pegs. To disassemble the grinder:
- Start by removing the lid from the grinding chamber. Depending on the type of grinder you have, it may be held in place with magnets or a screw-on mechanism.
- Once the lid is removed, you can separate the grinding chamber from the bottom section of the grinder. This is typically done by twisting the two sections in opposite directions, loosening any threads that hold them together.
- With the grinding chamber and bottom section separated, you can now access the kief catcher if your grinder has one. Take care not to lose any precious kief stored in the catcher!
- If your grinder has removable teeth or pegs, gently pry them out using a small tool like a toothpick or paperclip. Be cautious not to damage or lose any of these small components.
By carefully separating the different parts of your herb grinder, you’ll have a better understanding of how to clean each component effectively. Now that you’ve disassembled the grinder, it’s time to tackle the stubborn residue that has built up over time.
Tips For Removing Stubborn Residue
Over time, oils and plant matter can accumulate on the surfaces of your herb grinder, causing it to become sticky and less efficient. Here are a few tips to help you remove stubborn residue from each part of your grinder:
1. Soaking in isopropyl alcohol:
Isopropyl alcohol is a highly effective cleaning agent that can help dissolve and remove sticky residue. Submerge each part of your grinder in a bowl of isopropyl alcohol for about 30 minutes. For hard-to-reach areas, use a small brush or toothbrush to gently scrub away the residue.
2. Freezing and scraping:
If soaking alone doesn’t do the trick, try freezing your grinder for a couple of hours. Once frozen, use a plastic scraper or a blunt tool to scrape off the residue. The cold temperature will cause the gunk to harden, making it easier to remove.
3. Using a toothbrush:
A toothbrush can be a handy tool for removing residue from the teeth or pegs of your grinder. Dip the toothbrush in warm, soapy water and gently scrub away any buildup. Pay extra attention to the crevices where residue tends to accumulate.
Follow these tips to ensure your herb grinder is free from sticky residue, allowing for smoother grinding and maximum flavor extraction. Once you’ve cleaned each part of the grinder, it’s important to thoroughly dry them before reassembling. Stay tuned for the next steps in our comprehensive guide to cleaning a sticky herb grinder!
Read Also: How To Make An Herb Grinder?
Step 2: Freezing The Grinder
After disassembling your sticky herb grinder, it’s time to move on to step 2: freezing the grinder. Freezing your grinder is a simple yet effective method to clean off the sticky residue that builds up over time. In this step, we’ll explore the benefits of freezing the grinder and the proper way to execute this cleaning technique.
Explaining The Benefits Of Freezing The Grinder
Freezing your herb grinder offers several benefits when it comes to cleaning the sticky residue. Let’s take a look at some of these advantages:
- Easier residue removal: When you freeze the grinder, the sticky residue becomes more brittle and less clingy, making it easier to remove.
- Avoids damage: Freezing the grinder is a non-abrasive method that won’t cause any damage to the grinder’s delicate components, ensuring its longevity.
- Preserves potency: By freezing, you prevent the loss of valuable residue, ensuring that you can capture all the potency from your herbs during the cleaning process.
How To Properly Freeze The Grinder
Properly freezing your grinder requires a few simple steps to ensure effective cleaning. Here’s how you can do it:
- Disassemble the grinder: Remove the grinder’s various parts, including the lid, grinding chamber, and pollen chamber. This step allows for thorough cleaning and prevents any frost from accumulating on the connecting threads.
- Place the grinder in a sealable container: Transfer all the disassembled parts into a sealable container that can fit in your freezer. Ensure the container is clean and dry to prevent any cross-contamination or unwanted odors.
- Leave it in the freezer: Allow the grinder to sit in the freezer for at least 30 minutes or longer, depending on the level of stickiness. This time duration allows the sticky residue to freeze and become more manageable.
- Remove from the freezer: Once the freezing period is complete, take the sealable container out of the freezer.
- Thaw and clean: Opening the container, allow the grinder to thaw naturally to room temperature for a few minutes. This will make it easier to remove the frozen residue. Then, using a small brush or toothpick, gently scrape off the frozen residue from each part of the grinder.
- Wipe and assemble: After cleaning each grinder component, wipe them dry with a soft cloth or paper towel. Once completely dry, reassemble the grinder, making sure all parts fit snugly together.
By following these steps, you can ensure your grinder is thoroughly cleaned and ready for optimal performance. Keep in mind that freezing the grinder should be done periodically to maintain its efficiency and longevity.
Step 3: Removing Residue With A Brush Or Toothpick
Once you have soaked your sticky herb grinder in isopropyl alcohol and scrubbed it with a toothbrush or q-tip, there still might be some stubborn residue left clinging to the grinder’s teeth and crevices. In this step, we will explore the techniques for effectively removing this residue without damaging the grinder, leaving it clean and ready for your next grinding session.
Selecting The Right Brush Or Toothpick For The Job
Choosing the appropriate tool for removing residue from your grinder is of utmost importance. You want to ensure that you select a brush or toothpick that is sturdy enough to effectively remove the residue but gentle enough not to cause any damage.
For removing residue from the teeth and screen of your grinder, a small brush with firm bristles, such as a toothbrush or a cleaning brush specifically designed for grinders, works best. These brushes are usually small enough to fit into the tight spaces of the grinder and can reach those hard-to-reach areas.
Alternatively, if the residue is particularly sticky and hard to remove, a toothpick can be a handy tool. Its pointed tip allows you to easily scrape off the stubborn residue without scratching or damaging the grinder’s surface.
Read Also: How To Use A Dry Herb Grinder? A Step-By-Step Guide
Techniques For Effectively Removing Residue Without Damaging The Grinder
Now that you have the right tool for the job, it’s time to focus on the techniques that will help you remove residue efficiently without causing any harm to your grinder. Here are a few tips:
- Use gentle, but firm, motions: When using a brush, make sure to apply gentle pressure while scrubbing to avoid bending or breaking the bristles. If using a toothpick, be careful not to apply too much force that may cause the toothpick to snap.
- Work in small sections: Rather than trying to clean the entire grinder at once, focus on one section at a time. This will ensure that you thoroughly remove the residue without missing any spots.
- Pay extra attention to the teeth and screen: These areas tend to accumulate the most residue. Take your time to carefully remove any buildup in these areas, as they directly impact the grinder’s performance.
- Rinse and repeat if necessary: After removing the residue, rinse your grinder with warm water to wash away any remaining alcohol or residue. If there are still traces of residue left, repeat the process until your grinder is squeaky clean.
By following these techniques and using the right tools, you can effectively remove residue from your herb grinder and ensure it remains in optimal condition for your future grinding needs. With your grinder now clean and ready to go, you can once again enjoy the smooth and efficient grinding experience it provides.
Step 4: Cleaning With Isopropyl Alcohol
Isopropyl alcohol is an excellent solution for cleaning a sticky herb grinder because of its ability to dissolve sticky residue effectively. The high concentration of alcohol helps break down the sticky build-up, making it easier to remove from the grinder’s surfaces. This chemical solvent has a low boiling point, allowing it to evaporate quickly, leaving no residue behind. With its powerful cleaning properties, isopropyl alcohol ensures that your herb grinder remains clean and ready to use without any sticky remnants.
Safely And Effectively Using Isopropyl Alcohol For Cleaning
When it comes to using isopropyl alcohol for cleaning your herb grinder, it’s essential to keep safety in mind. Here’s a step-by-step guide on how to use isopropyl alcohol effectively:
- Gather your cleaning supplies: Before starting the cleaning process, make sure you have the necessary materials. These include isopropyl alcohol, a small container or bowl, a small brush or toothbrush, and some cotton swabs.
- Disassemble your herb grinder: To clean each component thoroughly, disassemble your herb grinder carefully. Separate the top and bottom pieces, as well as any additional chambers or sections.
- Soak the grinder parts: Fill the container or bowl with isopropyl alcohol, ensuring that you have enough to fully submerge the grinder parts. Place the disassembled pieces into the alcohol bath, allowing them to soak for at least 10-15 minutes. This soaking process helps loosen and dissolve the sticky residue effectively.
- Brush away the residue: After the soaking period, use a small brush or toothbrush to scrub away any remaining residue on the grinder parts. Pay close attention to the nooks, crevices, and teeth where the sticky build-up tends to accumulate.
- Clean hard-to-reach areas: For those hard-to-reach areas, such as the grinder’s teeth and threads, cotton swabs dipped in isopropyl alcohol are superb for targeting and removing sticky residue effectively. Gently swab these areas, ensuring that the cotton is saturated enough to dissolve the residue.
- Rinse and dry: Once you’ve thoroughly cleaned all the grinder parts, rinse them under running water to remove any remaining alcohol or residue. Pat them dry with a clean towel or allow them to air dry completely before reassembling your herb grinder.
By following these steps and using isopropyl alcohol properly, you can safely and effectively clean your sticky herb grinder. Remember to handle isopropyl alcohol in a well-ventilated area and avoid inhaling its fumes. With regular cleaning using isopropyl alcohol, your herb grinder will continue to function optimally, providing you with well-ground herbs for your enjoyment.
Step 5: Drying And Reassembling The Grinder
Once you have thoroughly cleaned your sticky herb grinder using the methods described in the previous steps, it’s essential to dry and reassemble it properly. Failure to do so might lead to rust or other damage, rendering your grinder unusable. Follow these steps to ensure your grinder is dried and reassembled correctly.
Proper Methods For Drying The Grinder
- Before you start drying the grinder, make sure all the components are free of any residues from the cleaning process. Wipe them gently with a clean cloth.
- One effective way to dry the grinder is to leave the disassembled parts in a well-ventilated area. Ensure they are placed on a clean surface to prevent any contamination.
- Alternatively, you can use a hairdryer on a low setting to speed up the drying process. Make sure to keep the hairdryer at a safe distance and avoid overheating the grinder.
- Remember to allow sufficient time for complete drying to prevent any moisture from compromising the functionality of the grinder.
- Once all the parts are thoroughly dry, you can move on to the reassembling process.
Tips For Reassembling The Grinder Correctly
- Begin by reattaching the chambers of the grinder in the correct order. Check for any grooves or markings that indicate the proper alignment.
- Take extra care while reinstalling the grinding teeth or blades to ensure they fit snugly and uniformly. Improper placement or alignment might result in uneven grinding and reduce the efficiency of your herb grinder.
- If your grinder consists of a mesh screen, carefully place it back in its designated position. Be gentle to avoid any tears or damage to the screen.
- Double-check that all the components, including the chambers, teeth, and screen, are securely fitted together.
- Once you are confident that everything is reassembled correctly, give the grinder a gentle twist to ensure smooth and effortless rotation. If it feels stiff or if any parts seem misaligned, disassemble and reassemble again.
By carefully following these drying and reassembling steps, you can prolong the lifespan of your sticky herb grinder and maintain its optimal performance. Regular cleaning and proper maintenance will ensure that your grinder remains sticky-free and provides you with fresh, finely-ground herbs whenever you need them.
Maintaining A Clean Herb Grinder
When it comes to enjoying the full flavor and potency of your favorite herbs, having a clean herb grinder is essential. Over time, the sticky residue from grinding herbs can build up, leading to a less efficient grinding process and a less enjoyable experience overall. In this post, we’ll discuss how to clean a sticky herb grinder and provide some best practices for preventing stickiness in the future. We’ll also recommend a regular cleaning schedule to ensure your grinder stays in top shape.
Best Practices For Preventing Stickiness In The Future
Prevention is always better than cure, especially when it comes to keeping your herb grinder free from sticky residue. By taking a few simple steps, you can significantly reduce the chances of experiencing excess stickiness. Consider the following best practices:
- Use properly cured herbs: Herbs that are too moist or sticky can easily leave residue in your grinder. Make sure your herbs are dry and cured properly before grinding them.
- Freeze your herbs: Placing your herbs in the freezer for a short time before grinding can help prevent stickiness. The cold temperature makes the herbs less sticky and easier to grind.
- Avoid overfilling the grinder: Overfilling your grinder can cause the herbs to get stuck and create more residue. Only grind small amounts at a time to ensure a smooth and efficient process.
- Choose the right grinder material: Opt for grinders made from materials like aluminum or stainless steel, as they are less likely to accumulate residue compared to plastic or wood grinders.
Regular Cleaning Schedule Recommendations
To keep your herb grinder performing optimally, it’s important to establish a regular cleaning routine. How often you clean your grinder depends on your usage frequency, but a general recommendation is to clean it at least once every few weeks. However, if you notice increased stickiness or a decline in grinding efficiency, it’s a sign that your grinder needs cleaning sooner.
Here’s a step-by-step guide to cleaning your herb grinder:
- Disassemble your grinder: Take apart all the components of your grinder, including the top chamber, grinding chamber, and pollen catcher. This will allow you to clean each part thoroughly.
- Remove excess residue: Use a brush or toothbrush to gently remove any excess residue from the grinder components. Be sure to brush all the nooks and crannies to remove any stuck particles.
- Soak the grinder: Fill a bowl or container with isopropyl alcohol or a cleaning solution specifically designed for grinders. Submerge the grinder parts in the solution and let them soak for about 20-30 minutes. This will help dissolve any stubborn residue.
- Scrub and rinse: After soaking, use a toothbrush or q-tip to scrub away any remaining residue. Rinse each part thoroughly with warm water to remove any cleaning solution or alcohol residue.
- Dry and reassemble: Dry each component with a clean cloth or allow them to air-dry completely to prevent any moisture buildup. Once dry, reassemble your grinder and it’s ready for use.
By following these best practices for preventing stickiness and adhering to a regular cleaning schedule, you can ensure that your herb grinder functions at its best. A clean grinder not only improves the grinding process but also extends the lifespan of your device, allowing you to enjoy the full aroma and flavor of your herbs with every use.
Frequently Asked Questions On How To Clean A Sticky Herb Grinder
How Do I Make My Grinder Not Sticky?
To prevent your grinder from getting sticky, you can clean it regularly using isopropyl alcohol or warm soapy water. Make sure to remove any remaining residue and let it dry completely before using it again. Regular maintenance will keep your grinder operating smoothly.
How Do You Get Sticky Kief Off A Grinder?
To remove sticky kief from a grinder, follow these steps: 1. Freeze the grinder for about 20-30 minutes. 2. Take the grinder out and tap it gently to dislodge the kief. 3. Use a brush or toothbrush to scrub off any remaining residue. 4. Collect the kief and enjoy!
How Do You Fix A Stuck Herb Grinder?
To fix a stuck herb grinder, try cleaning it with warm soapy water and a brush, then drying it thoroughly. If that doesn’t work, try tapping it gently or using a toothpick to loosen any stuck herb. If all else fails, disassemble the grinder and carefully remove any obstructions.
Should I Boil My Grinder To Clean It?
No, boiling your grinder is not recommended as it can damage the materials. Instead, use a brush and isopropyl alcohol to clean it. This method effectively removes residue and keeps your grinder in good condition.
Conclusion
To restore your herb grinder’s functionality and maximize its lifespan, it’s essential to keep it clean and free from sticky residue. With the right tools and techniques, this task can be easily accomplished. Regular cleaning not only enhances performance but also ensures a smooth grinding experience every time.
By following the steps and tips provided in this post, you can easily maintain a clean and sticky-free herb grinder. Remember, cleanliness is key!