If you’re looking to process your own meat at home, you’ll need a quality meat grinder. KitchenAid meat grinders are a popular choice for home chefs who want to have more control over the ingredients in their food. In this article, we’ll show you how to assemble a KitchenAid meat grinder so you can start making your own ground beef, pork, lamb, or poultry.
1. Begin by attaching the grinder attachment to the KitchenAid stand mixer. Make sure that the grinder attachment is firmly in place and will not come loose during operation.
2. Place the cutting blade into the grinder attachment. Make sure that the cutting blade is firmly in place and will not come loose during operation.
3. Place the grinding plate onto the cutting blade. Make sure that the grinding plate is firmly in place and will not come loose during operation.
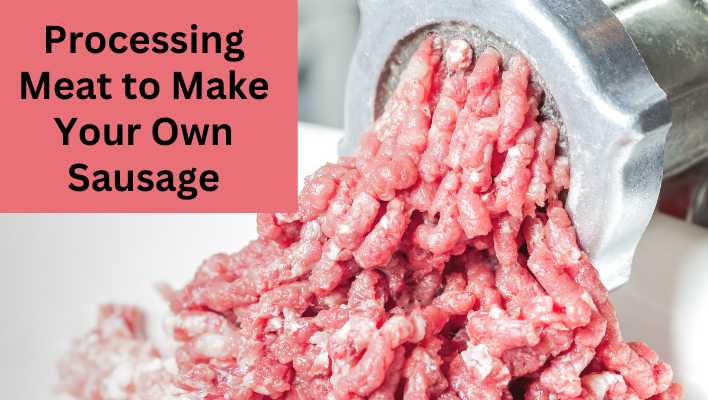
4. Insert the meat into the grinder attachment. Make sure that the meat is firmly in place and will not come loose during operation.
5. Turn on the KitchenAid stand mixer and let the grinder attachment do its work. Grind the meat until it reaches the desired consistency.
6. Turn off the KitchenAid stand mixer and remove the ground meat from the grinder attachment. Enjoy!
How do you assemble a meat grinder on a KitchenAid mixer?
Assuming you would like a blog post discussing how to assemble a Kitchenaid meat grinder: If you have a Kitchenaid meat grinder, you know how useful it can be for grinding meat at home. But how do you assemble it?
Here are some easy steps to follow:
1. Start by attaching the grinder attachment to the power hub of your Kitchenaid stand mixer.
2. Then, put the auger into the grinder attachment.
3. Next, put the cutting plate onto the auger. Make sure that the teeth of the cutting plate are facing the right way!
4. Now, put the grinding worm into the grinder attachment.
5. Finally, attach the food pusher to the grinder attachment. Your Kitchenaid meat grinder is now assembled and ready to use!
Which way does the blade go on a KitchenAid meat grinder?
Assuming you would like a blog post on how to assemble a KitchenAid meat grinder attachment: If you’re a fan of making your own ground meat at home, you’ll love using the KitchenAid meat grinder attachment. This handy tool attaches to the power hub of your KitchenAid stand mixer, making quick work of ground beef, pork, or poultry. Plus, it comes with a set of three grinder plates (fine, medium, and coarse), so you can customize the grind to your liking.
Here’s a step-by-step guide on how to assemble the KitchenAid meat grinder attachment:
1. Start by attaching the grinder housing to the power hub of your mixer. Make sure that the housing is locked into place by turning it to the right.
2. Next, take one of the grinder plates and insert it into the housing.
How do you take apart a meat grinder?
If you’re looking to grind your own meat at home, a Kitchenaid meat grinder is a great option. With a variety of attachments available, you can use your Kitchenaid to grind meat for burgers, sausages, and more.
Here’s a step-by-step guide on how to assemble your Kitchenaid meat grinder so you can get started.
1. Start by attaching the grinder attachment to your Kitchenaid stand mixer. If you’re using a different brand of mixer, consult your manual for instructions on how to do this.
2. Once the grinder attachment is in place, fit the coarse grinding plate onto the grinder.
3. Place the grinding worm onto the shaft of the grinder.
4. Fit the second grinding plate onto the grinder.
5. Insert the food pusher into the grinder.
6. Your Kitchenaid meat grinder is now assembled and ready to use.
How do I use my KitchenAid metal meat grinder?
Assuming you would like a blog post on how to assemble a KitchenAid meat grinder: Assembling your KitchenAid meat grinder is a simple process that anyone can do. The first thing you need to do is gather all the parts and pieces. You will need the grinder body, the grinder worm, the knife, the plate, and the stomper.
Once you have all the parts, it’s time to start assembly. To start, take the grinder body and attach the grinder worm to the power shaft. Next, take the knife and insert it into the grinder worm.
Make sure the knife is facing the right direction before tightening. After the knife is tight, insert the plate onto the shaft. You may need to wiggle it a bit to get it all the way on.
Now it’s time to attach the stomper.
Kitchenaid meat grinder manual
If you’re looking to process your own meats at home, you’ll need a good meat grinder. KitchenAid’s meat grinder attachment is a great option for those looking for a quality grinder that will fit onto their KitchenAid stand mixer. In this post, we’ll show you how to assemble and use your KitchenAid meat grinder attachment. First, you’ll need to attach the grinder to the mixer.
To do this, simply fit the square shaft of the grinder into the square hole on the mixer. Next, you’ll need to secure the grinder by tightening the two screws on the side of the mixer. Now it’s time to start grinding!
If you’re using the grinder for the first time, you’ll need to season it first. To do this, simply grind up some scrap meat (chicken or beef works well) and discard it. This will help to lubricate the grinder and prevent any sticking.
Kitchenaid meat grinder blade direction
If you’re looking to add a meat grinder to your kitchen arsenal, you’ll want to check out the Kitchenaid meat grinder. This handy tool can make light work of grinding meat, and it’s easy to assemble too. Here’s a quick guide on how to put it together.
You’ll need:
– The Kitchenaid meat grinder attachment
– A Kitchenaid stand mixer
– The grinder’s food pusher
– The grinder’s auger
– The grinder’s die plate
To start, attach the grinder attachment to the mixer.
Then, put the die plate onto the grinder attachment, followed by the auger. Make sure that the auger is turned so that the spiral side is facing up.
Now it’s time to start grinding.
Put the meat into the grinder’s feed tube, and use the food pusher to push it down.
How to disassemble Kitchenaid meat grinder
Assembling a Kitchenaid Meat Grinder is a relatively easy process that anyone can do with a little bit of time and patience. The first thing you need to do is gather all of the necessary parts and tools. You will need the meat grinder attachment, the auger, the cutting plate, the food pusher, and the stomper. You will also need a Phillips head screwdriver.
Once you have all of the parts and tools gathered, you can begin the assembly process. The first thing you need to do is attach the meat grinder attachment to the mixer. To do this, you will need to line up the attachment with the mixer’s power hub.
Once the attachment is lined up, you can insert the auger into the power hub. After the auger is inserted, you can then attach the cutting plate to the attachment.
Kitchenaid meat grinder attachment
If you’re looking to grind your own meat at home, a Kitchenaid meat grinder is a great option. In this post, we’ll walk you through everything you need to know to assemble your Kitchenaid meat grinder, including what attachments you’ll need and how to use them.
To start, you’ll need the following attachments for your Kitchenaid meat grinder:
-The grinding worm
-The cutting plate
-The stomper
-The sausage stuffer kit (optional)
Once you have all of your attachments, you’re ready to start assembling your meat grinder. The first step is to attach the grinding worm to the housing. Next, you’ll need to select the cutting plate that best suits the grind you’re looking for.
Once you’ve selected your cutting plate, attach it to the grinding worm.
Now it’s time to start grinding!
Kitchenaid meat grinder metal
If you’re looking to grind your own meat at home, a Kitchenaid meat grinder is a great option. In this post, we’ll walk you through everything you need to know to assemble your Kitchenaid meat grinder, so you can get started grinding your own meat in no time. First, you’ll need to gather all of the parts and tools you’ll need to assemble your meat grinder. You’ll need the base of the grinder, the grinder head, the auger, the die plate, the knife, the stomper, and the screw.
You’ll also need a Phillips head screwdriver. Once you have all of your parts and tools, you’re ready to start assembling your grinder. Start by attaching the base of the grinder to the grinder head.
Kitchenaid meat grinder parts
If you’re a fan of making your own ground meat at home, you’re going to need a good meat grinder. And for many home cooks, that means the KitchenAid meat grinder attachment. This handy tool attaches to your KitchenAid stand mixer and makes quick work of grinding meat for burgers, meatballs, sausage, and more. If you’re new to using a meat grinder, don’t worry – it’s actually quite simple.
Just follow these step-by-step instructions and you’ll be grinding meat like a pro in no time.
1. Start by attaching the meat grinder attachment to your KitchenAid stand mixer. Make sure it’s securely in place.
2. Cut your meat into small, manageable pieces. You don’t want to try to grind a big hunk of meat all at once – it will get stuck in the grinder.
3. Put the meat into the feed tube of the grinder.
Kitchenaid meat grinder troubleshooting
Assuming you’re referring to the KitchenAid stand mixer attachment meat grinder… The KitchenAid stand mixer attachment meat grinder is a versatile tool that can be used to grind meat, vegetables, or breadcrumbs.
Here’s a step-by-step guide to assembling and using your meat grinder:
1. Begin by attaching the meat grinder attachment to your KitchenAid stand mixer. Make sure the mixer is turned off and unplugged before attaching the meat grinder.
2. Next, choose the grinding plate that you will use. The size of the grinding plate will determine the size of the grind. For example, a coarse grind would be best for hamburger meat, while a fine grind would be better for making sausage.
3. Once you have chosen your grinding plate, place the plate on the hub of the meat grinder attachment.
4. Now it’s time to choose your meat.
Kitchenaid meat grinder metal vs plastic
If you’re looking to grind your own meat at home, a Kitchenaid meat grinder is a great option. In this post, we’ll walk you through everything you need to know to assemble your Kitchenaid meat grinder, from attaching the grinder attachment to your Kitchenaid mixer to using the grinder to make ground meat. First, make sure you have the following items: the grinder attachment for your Kitchenaid mixer, the coarse grinding plate, the fine grinding plate, the sausage stuffing kit (if you’re planning on making sausage), and the food pusher. Next, attach the grinder attachment to your Kitchenaid mixer.
To do this, simply remove the pouring shield from your mixer and attach the grinder in its place. Once the grinder is attached, you’re ready to start grinding meat. If you’re making ground meat, you’ll want to use the coarse grinding plate.
- Read More: How To Clean A Meat Grinder?
Conclusion
It’s really easy to assemble a Kitchenaid meat grinder. Just follow the instructions in the manual and you’ll be able to put it together in no time.